Monday, August 24, 2015

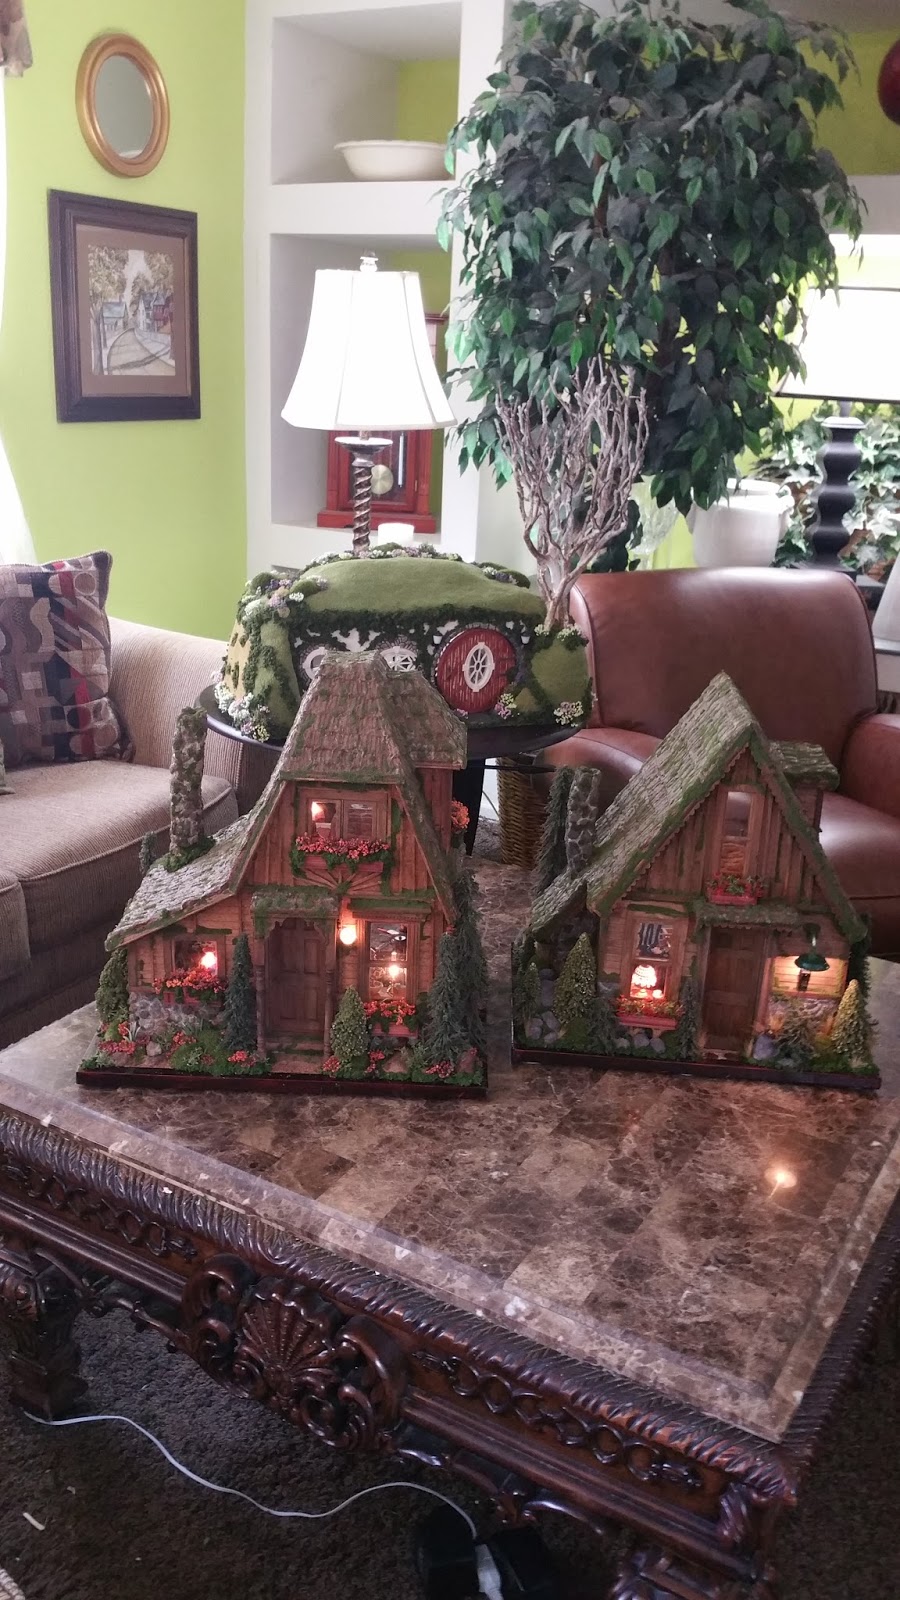
 Mountain Cottage House- This is part of my 5 August Houses I have completed.  This mountain cottage was completed with a 2nd mountain house cottage I build together.  I was so inspired and my creative juices were flowing this month.  On this house and its companion house I uses all the left over bits of wood and windows I had left over from years of projects.  I also started using lots of popsicle sticks for the flooring on these two houses which led me to use the popsicle sticks for flooring and walls on other projects.  I made this house and the other house in a 7 day period.  I have been home with a medical condition having a ton of pain in which I can sit on the edge of the couch hunched over just for comfort.  So I figure if that's the position I am in I might as well build some houses on the coffee table in front of me.  I spent 10 hours alone just doing the landscaping on both houses.  The little flowers came from the Dollar Store in which they were part of larger flowers that I cut apart for the mini flowers.  some of the trees are ones that I bought at the dollar store during Christmas time and then added glue too them and dipped them in the green landscaping fluff stuff to give them a shrub realistic look.  The other large pine trees I did buy from the model train store.  I am trying to give a more realistic look to the landscaping.  I really am starting to like the look I am getting using wood and paper clay together for a more realistic looking house. 


These are the 2 house together. 


Before landscaping. 

Trying to do the electrical system in the house from left over electric items.  and trying to do it with no money and creative ideas. 


As you can see here I even made paper clay stones and boulders for the landscaping. 


Box Room Display I made this weekend 8/23/2015!  This is my first Box Room Display I have ever made.  It took me about 3 days to put together.  I had so much fun trying to make it from varieties of scrap wood and my Favorite- Popsicle Sticks.  Miniature Store wood and flooring is so frikin Expensive and using popsicle sticks is so easy and fun to use and also Inexpensive.  The funny this is I had bought the back wall unit years ago and had actually spent about 2 days filling in all the defects and spaces with wood putty and sanding to perfection, Just to paint it and age it and make it look old and weathered, so I went a completely different direction and could have saved days of work if I would have known I was going to distress it anyway.   I hope you like this project, it was so much fun and sort of nice not having to build a house to decorate an interior which is my favorite thing to do.

The little flower arrangements took me longer to put together than completing the interior decorations.  The 4 chairs in the center of the room and the table and grandfather clock were plastic models I also put together this weekend and since they were a tan color, I painted them black and then proceeded to paint the hutch, the blue chair and the desk black also so that all the furniture matched and also so they would coordinate with the black fire place. 


To get the distressed look on the walls and floor and ceiling I painted everything with a Watered Down Brown paint, which is more like staining the wood then painting it and you can see the wood grain through it.  I needed the darker color since I was going to use a Crackle Paint technique which you need a darker cooler on the base so it shows through the cracks.   Once the brown paint dries, I then paint on a Crackle Paint Product that is clear, which starts to dry in about 15 minutes, and when its tacky I then paint the White paint over top of it and let it dry, you can then see it start to crackle the paint.   Once that's dry I use a knife and start scrapping and roughing up the wood to give it a distressed look.   


Mini Dome Cottage.  Hi Everyone, I will be quick with posting some pictures of my newest projects.  I have been very busy and made 5 new houses this month to sale at the upcoming miniature sales show.  I found this little glass dome at a thrift store and decided I would build a mini cottage inside the dome.  It was a really fun quick 2 day project.  Lots of left over wood and windows and some paper clay to make the shingles....


Tuesday, July 28, 2015

Flintstone House Completed.  Hi Everyone, I finally got inspired to complete the Flintstone House I started many many months ago.  Once I was done building the house with all the paper clay it literally took a couple of months for the paper to dry.  This house I think is literally one of my favorite miniature houses.  I had to even create all the interior furniture, which was all made out of the paper clay.  I taught myself how to make a Fire Torch for the front porch which I think turned out pretty awesome.  I hope you all like how the Flintstone House turned out and may be inspired to create a miniature house.  Please see past post of how the Flintstone House was created from start to finish.  I hope you all have a fabulous week!  I am in the process of creating a few more houses within the next month to finish right before the Miniature Show in September.  I think this house will be a big hit at the Miniature Sales Show.  But I am considering about making the Flintstone Car to go along with the house.  But not sure if ill have time to make it before the show.  Big Hugs to Everyone!  Stan


I have a hard time taking pictures with my cell phone, but from this angle you can see the slope on the roof just like the picture I created the house from. 


I decided to add an outdoor fire pit to give the house some extra character.

The Trees I had a lot of fun making, I started with rolling up some card board to get a circular shape half the size I wanted the tree to be wide, then I added the paper clay around the tree and then made marks in the tree with a fork, then I baked it in the oven for many hours on low temperature.  Then I had an old plastic fake plant with wide leaves with metal centers and I proceeded to cut the leaves and bend them into the current shape, then I hot glued the leaves to the top of the tree that I had left a hole in the top before it was baked in the oven. 

I tried my best making some dinosaur eggs out of clay.  But I am very proud of how my interior furniture turned out I made out of the paper clay.  It took me a little time to try and make them look like stone furniture.

My friend Stephanie from Wyoming had made these awesome little food items such as the sub sandwich and banana's that I bought from her last year at the miniature show. 

I made the little wood club on the couch out of clay and the club on the upper wall above the door I carved out of wood. 

I am very proud of the little Flintstone TV I made.  It is too hard to see up close with the phone pictures.  But what I did was get a mini picture of the Flintstones and printed it out on clear plastic sheet and then cut out and taped onto thick plastic to fit the opening on the TV, then I put about 1/4 of an inch of Hot Glue on the back of that so you could not see the light behind the picture.  Its a little blurry up close but it was the best I could do to make the TV look realistic. 


I made the horns on the walls from 2 Christmas Reindeers I had and ripped off the horns that were brown and then I painted them white and dry brushed them with some grey to give them an aged look. 

I took ordinary doll house lamps and glued on animal print paper and then glued on some animal fur around them to give them a caveman look. 


This is the kitchen sink area I took a picture of outside of the house since I couldn't get a good picture of it inside the house.

This was my first attempt at making the TV insides in which I drew some caveman pictures, which I soon disliked and then had to spend an hour to tear the insides apart and redo with  a more realistic looking TV picture which I ended up putting the Flintstone Scene inside it. 

One step in the process of making the furniture.  In which I made each piece by hot gluing cardboard pieces together to make a basic shape of each piece of furniture, then I added paper clay all around the cardboard, then I baked them in the oven for 5 hours each day for 2 days  so they would take a month to dry out in the open like I would regularly do.  Then once the furniture was dry I spent many many hours sanding each piece with a large sander machine, in which I found out once the paper is dry its just like Cement and took forever to get a stone look.  But I'm so proud how the furniture turned out.